9 May 2024
Refinishing Engineered Flooring
In this blog we take a look at Refinishing Engineered Flooring, are your floors looking lackluster, worn, or just not as stunning as they once were? Fear not! With the right tools, a bit of know-how, and some elbow grease, you can bring back the luster and charm of your engineered flooring. In this guide, we’ll walk you through the steps to refinish your engineered floors, breathing new life into your space.
Assess the Condition
Before diving into the refinishing process, take some time to assess the condition of your engineered flooring. Look for scratches, dents, stains, and areas where the finish has worn away. Assessing the extent of the damage will help you determine the level of refinishing required.
Gather Your Tools and Materials
To refinish your engineered flooring, you’ll need:
- Sanding Equipment: Depending on the condition of your floors, you may need a drum sander, a hand-held orbital sander, and sandpaper of varying grits.
- Vacuum Cleaner: To remove dust and debris between sanding stages.
- Wood Filler: For filling in any deep scratches or gaps.
- Stain (Optional): If you want to change the colour of your floors.
- Floor Finish: Choose a high-quality polyurethane or oil-based finish for durability and longevity (follow manufactures guidelines)
- Paintbrushes or Applicators: For applying the stain and finish.
- Safety Gear: Dust mask, goggles, and gloves to protect yourself during the refinishing process.
Step-by-Step Refinishing Process
1. Prepare the Room
- Clear the room of furniture and rugs etc.
- Ensure proper ventilation by opening windows and using fans.
- Cover doorways and vents to prevent dust from spreading to other areas of your home.

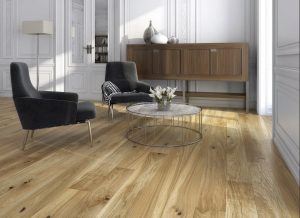
Columbus 5G Click Brushed and Oiled Oak 130mm Engineered Flooring
2. Sanding
- Begin with a coarse-grit sandpaper to remove the existing finish and level the surface.
- Work in the direction of the wood grain, using smooth, even strokes.
- Gradually progress to finer grit sandpaper to achieve a smooth, uniform surface.
- Vacuum the floor thoroughly between sanding stages to remove dust and debris.
3. Repair
- Use wood filler to fill in any deep scratches, gouges, or gaps in the flooring.
- Follow the manufacturer’s instructions for application and drying times.
- Sand the repaired areas lightly to ensure a seamless transition with the rest of the floor.
4. Staining (Optional)
- If you wish to change the colour of your floors, apply the stain evenly with a paintbrush or applicator.
- Allow the stain to penetrate the wood according to the manufacturer’s instructions.
- Wipe off any excess stain with a clean cloth before it dries to avoid uneven coloration.
5. Applying Finish
- Once the stain (if used) has dried completely, apply the floor finish evenly with a paintbrush or applicator.
- Work in small sections, overlapping each stroke slightly to ensure uniform coverage.
- Allow the first coat to dry according to the manufacturer’s instructions before applying additional coats.
- Lightly sand between coats for optimal adhesion and a smooth finish.
- Apply multiple coats of finish for added durability, allowing each coat to dry thoroughly before proceeding.
6. Finishing Touches
- Once the final coat of finish has dried, carefully inspect the floors for any imperfections.
- Touch up any uneven areas or missed spots as needed.
- Allow the finish to cure completely before moving furniture back into the room and resuming regular foot traffic.
Maintenance Tips
- Protect your newly refinished floors by placing felt pads under furniture legs to prevent scratches.
- Clean spills promptly to avoid staining and water damage.
- Use a soft-bristle broom or vacuum with a hardwood floor attachment to remove dirt and debris regularly.
- Avoid using harsh chemicals or abrasive cleaners, as they can damage the finish over time.
By following these steps and maintaining your refinished engineered flooring properly, you can enjoy beautiful, long-lasting floors that enhance the aesthetic appeal of your home for years to come. So, roll up your sleeves, unleash your inner DIY enthusiast, and transform your space with the timeless elegance of refinished engineered flooring!
Be sure to check out all of our Engineered Flooring options on our website here.


 Quickstep
 COREtec
 Egger
Egger Balterio Collection
 Chene Firmfit
 Luvanto
 Belle Flooring
 Capital
 Luvanto Design
 Luvanto Click
 TLC Vinyl Flooring
 Rhinofloor
 Kaindl
 Lifestyle Floors Love AQUA
 Polyflor
 Life Flooring
 Capital Creation
 LG Hausys
 Krono Swiss
 Fusion Flooring
 Columbus Flooring
 Kersaint Cobb
 Bostik
 Moduelo
 Krono Original Xonic
 Palletforce
 Meister Flooring